How to Start an Online Boutique
(in 5 easy steps)
Before I opened up any of my brick and mortar boutiques, I first started with an online boutique.
I’ve tried many different ways of designing and developing my site throughout the years, even attempting to code my own site in Dreamweaver. (Which quickly led me to hiring someone on Cragislist to do it for me. 🙂 )
A few years back, I came across Shopify and decided to make the move and haven’t looked back since. I loved how simple everything was and the themes they had to choose from had me giddy. You can really make a beautiful site with little to no experience at all! I couldn’t believe that I had waited so long to make my life so much more simple.
In this post, I want to show you how to set up and start your own boutique website with Shopify in 5 simple steps.
Disclaimer: Please note that some of the links below are affiliate links and I will earn a commission if you decide to purchase through those links. I only recommend products and services that I personally use from companies that I trust.
How to Start an Online Boutique
1) Sign up at Shopify.
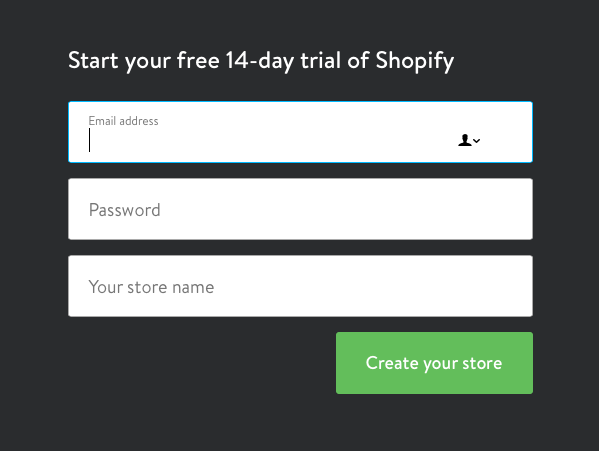
First things first. Go to Shopify and sign up (you get a 14-day free trial!). I love the saying they have when signing up for Shopify – “Start your dream business for less than the price of two lattes.” Oh so true and really puts things into perspective.

2) Choose a theme and customize.
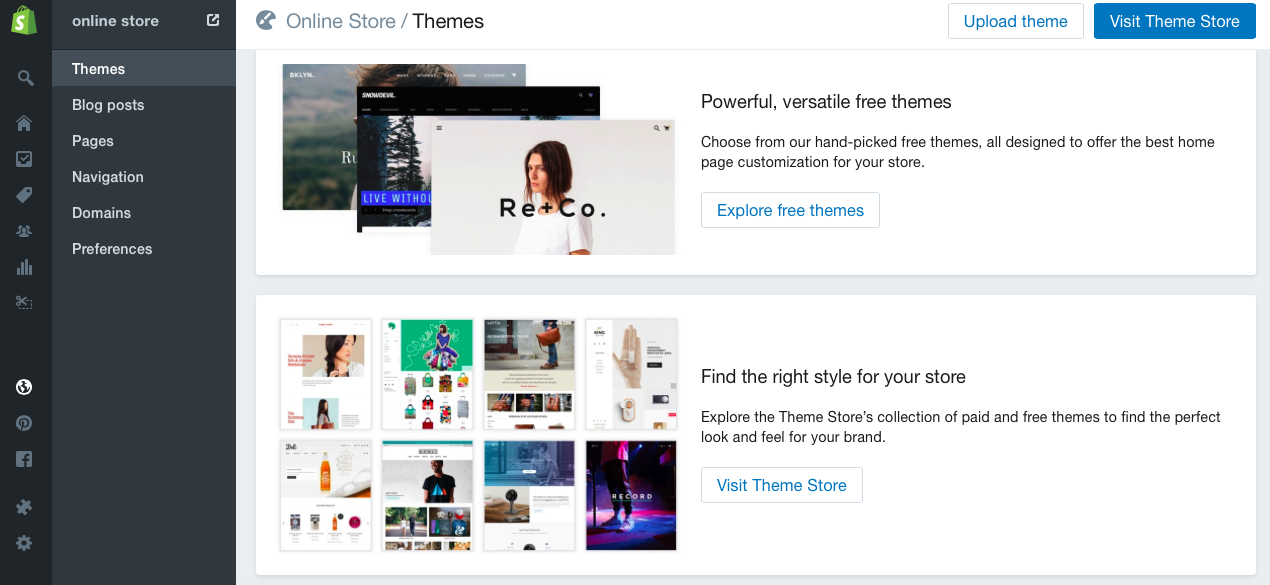
I said it before and I’ll say it again – I really love Shopify’s themes. They have various free themes and also paid themes. I currently use the Minimal theme which is one of their free themes.
You can check out and choose your theme here.
After you choose a theme, you can keep the original settings of the theme, or you can customize your theme colors, add your boutique’s logo, add your social media links, etc.
Once you have installed your theme, in your Admin, click Themes, and then click where it says Customize Themes.
You should see something like this where customizing is very straight forward and easy!
3) Add a product.
Now it’s time to upload your fabulous products.
First, you’ll want to create Collections for your products. For example, some of my Collections are Tops, Jewelry, Bottoms, etc. This is how your product will be categorized on your website under your tabs.
You can create Collections by clicking Collections in your Admin and then ‘Add Collection’ in the upper right hand corner.
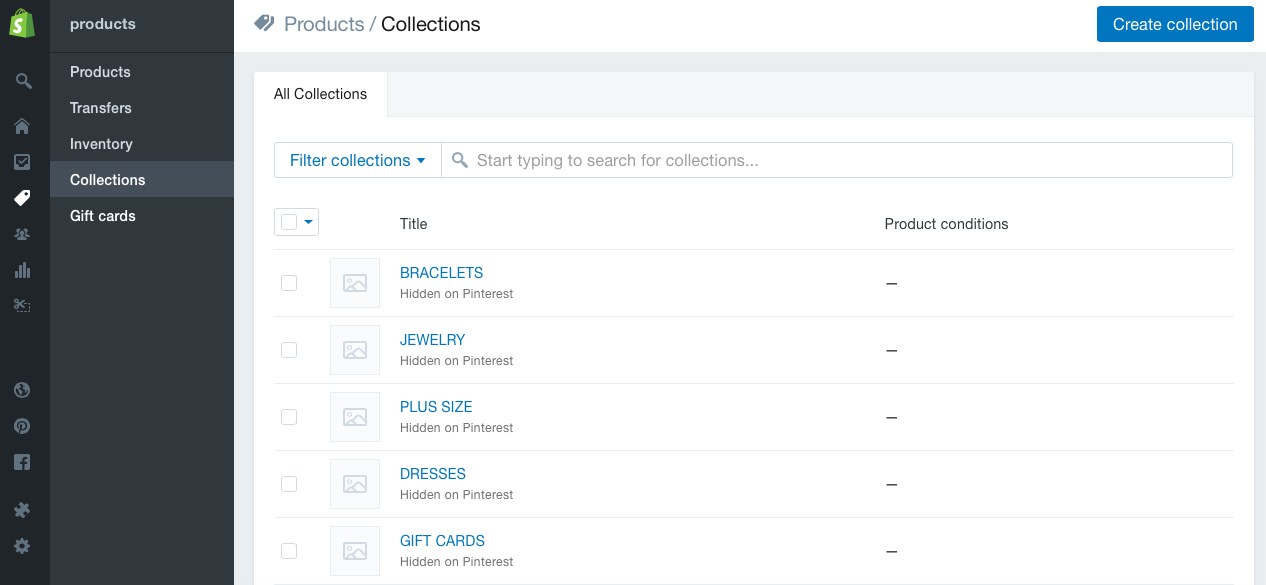
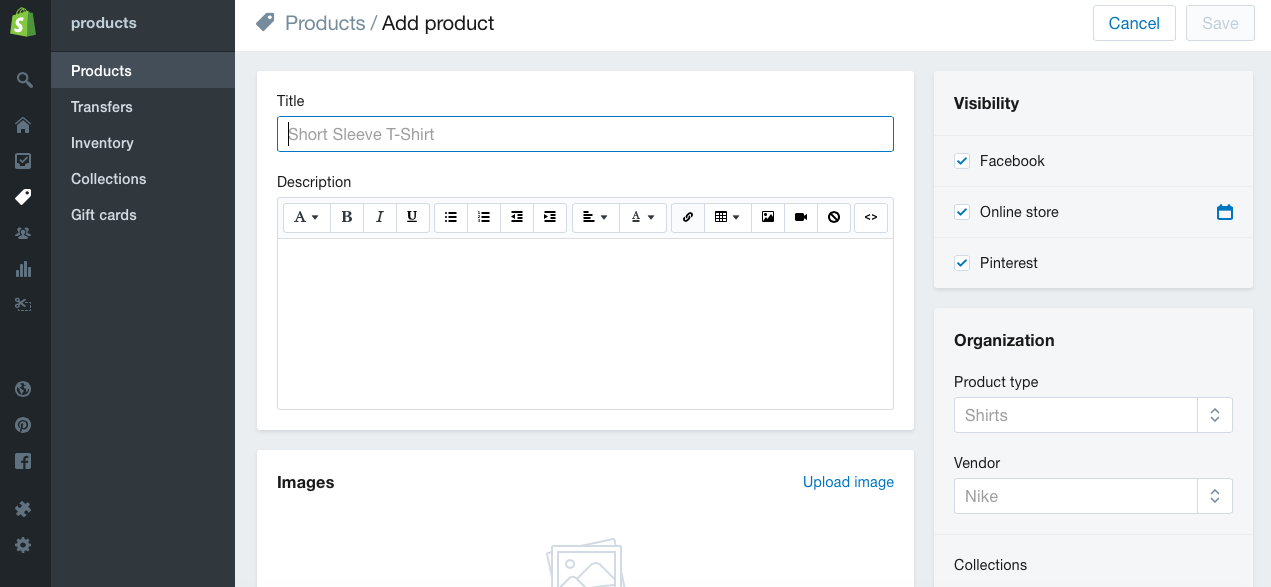
After you create your Collections, click on Products in your Admin and then ‘Add Product’ in the upper right hand corner.
Fill out all the pertinent information and hit ‘Save’ and you’ve added your first product!
4) Choose a plan and purchase your domain.
Before you can launch you’re new website, you will need to choose a plan.
Everyone has different needs when it comes to choosing a plan that’s right for your boutique. Shopify has 3 main plans: Basic Shopify, Shopify, and Advanced Shopify. I have the Shopify Plan which is $79 per month and I highly recommend this one.
The main reason I chose this plan was so that I could get the the gift card feature and the abandoned cart recovery feature. Every time someone puts items in their cart, but doesn’t purchase right of way, they will get an email at the time I set (I have mine set to send 6 hours after the cart was abandoned) reminding them that their items are still in their cart just waiting to be purchased. This has really helped out my sales! I mean how many times have I done that myself shopping online? I’m shopping one minute and distracted by Facebook the next 🙂 . So, it’s nice to get that little reminder that my items are still there waiting for me.
There is also a Shopify Lite plan that is only $9/month that will allow you to sell
After choosing your plan, you can then purchase your domain (which I recommend or else your website address will be myawesomeboutique.shopify.com instead of myawesomeboutique.com.) The latter just looks and sounds so much more professional!
You can purchase your domain right through Shopify with most domains costing $9/year.
So, in your shop Admin click Settings at the bottom and then Domains.
In the upper right hand corner click Buy Domain at which point you will see this:
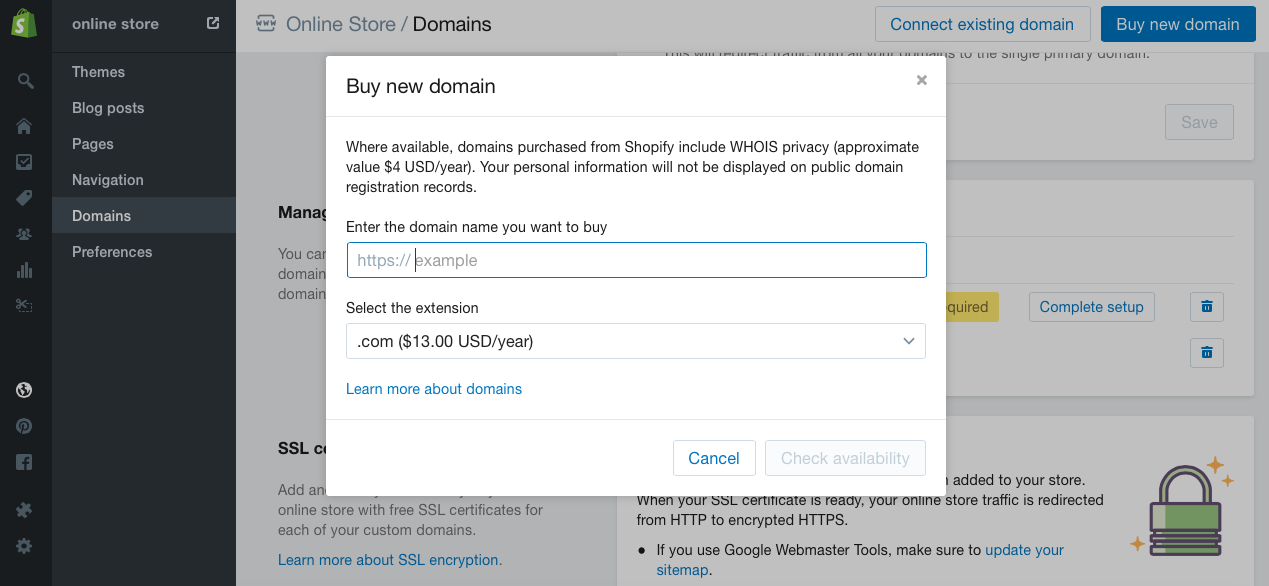
If the website you want is available, then you will follow with your payment information. Shortly thereafter you will receive an email confirmation and you will need to verify your email by clicking the verification link.
5) Receive your first order!
There’s nothing more exciting than receiving your first order! (I also downloaded the Shopify app on my iphone and love seeing my order notifications pop up!)
To get ready to accept orders, there are a few more settings to configure in Shopify.
In your Admin > Settings you’ll want to make sure you go through the following settings – Payments, Checkout, Shipping, and Taxes. Shopify does a great job of walking you through all of these settings in the easiest way possible.
Here is how I have a few of my settings set up:
- In Payments, I use Shopify payments and Paypal as payment options.
- For Shipping, I have it set up to charge a $5.00 flat rate for U.S. shipments and $20.00 flat rate for International orders using USPS.
- Under Taxes, it is set up to collect taxes in the state that my business is in (Wisconsin). (Make sure to set aside the money you collect in taxes as you will have to pay this quarterly or annually depending on your state.)
And that’s it you guys! If you have any other questions, please feel free to email me and if you liked this post don’t forget to sign up for more! 🙂
**Updated April 2017
