Wouldn’t it be great to have your own photo studio at home (or at your boutique) to take your own photos?
What if I told you that it could be done for less than $100?!
Great and professional looking photos are the single most important thing for your online boutique. You will need awesome photos to be able to compete with other online boutiques and to be at the same level of so many other online boutiques out there.
The good news is that you don’t need to be a professional photographer to take professional looking photos!
And if you’re anything like me, you don’t want to spend a fortune on trying to achieve professional photos.
I’m always trying to come up with ways to do a lot of things for my boutique with a “DIY” mentality without having to incur a high cost.
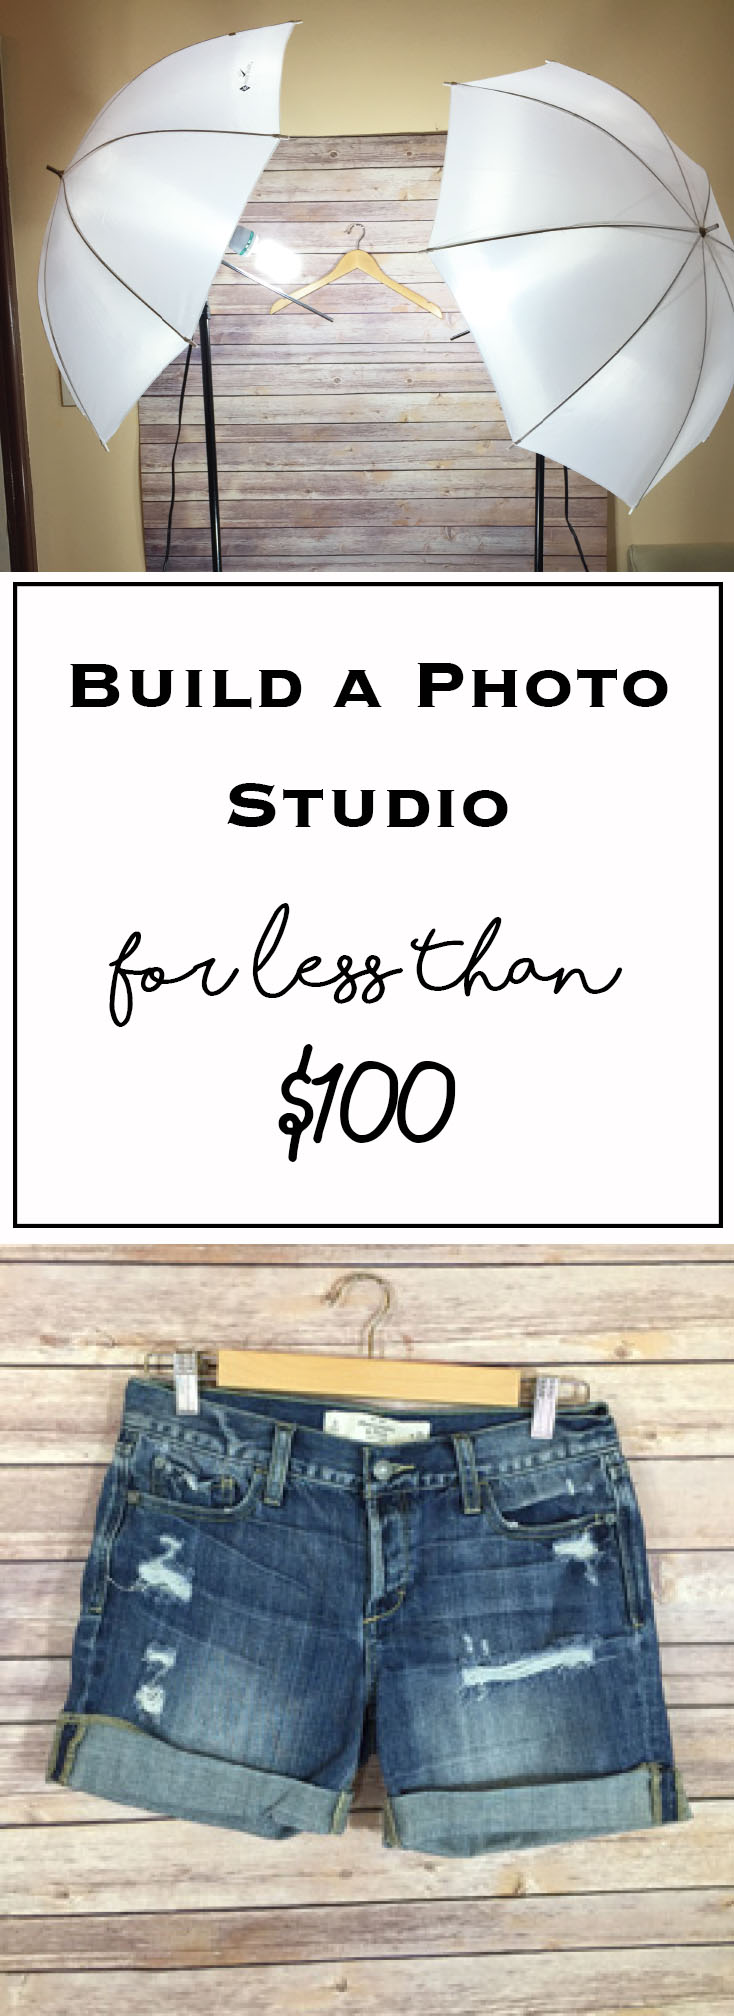
Recently, I have been creating listings for my Poshmark closet to sell unworn items from my closet. I have been taking these photos with my iPhone 6+ so I can upload them right of way in the Poshmark app. Here are some of the photos I was able to take with the items I purchased for my photo studio:
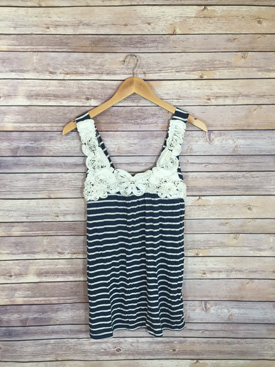
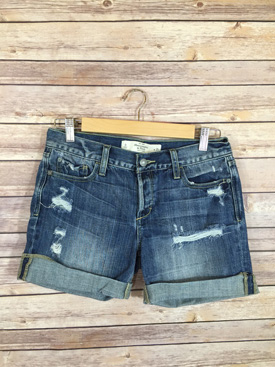
When just starting out, you don’t need to purchase an expensive camera and really can use any smartphone or other camera you may have to take your photos with. If I’m not using my iPhone 6+ for photos, I also have an Olympus that I use.
In order to build your photo studio for less than $100, here’s what you will need to get started:
Choose Your Lighting
Since I was planning to have my photo studio in my home which has (and I’m not kidding) the worst lighting ever, I knew I was going to have to purchase some additional lighting to really help make my photos look great.
I chose the Photography Photo Portrait Studio 600W Day Light Umbrella Continuous Lighting Kit by LimoStudio LMS103 for $49.50 (pictured below) mainly because it was a cost effective option and it got good reviews on Amazon because quite frankly, I don’t know much about photography lighting. I also love that it comes with a storage bag and when it’s broken down it takes up very little space.
I set up the lights and umbrellas at different heights adjusted to hit the garment at the right angle for the best looking photos. I tested out a few photos before figuring out how to exactly angle the lights for the look I wanted.
Choose a Backdrop
The good news is that there are a TON of different backdrop options available. You can choose just a plain white background or choose colors, textures, etc. I liked the distressed wood look, so I chose a printed paper background.
I went with paper instead of vinyl again for the low cost and because I wasn’t sure if I was going to totally love it or maybe want to try out a few backgrounds before finding one that I really liked.
I chose the Ella Bella Photography Backdrop Paper, 4’x12′, Vintage Wood (pictured below) for $10.39 to try out for my first photo shoot.
Since the backdrop was 12′ long I cut it to the size I needed and taped it to my living room wall. I’m sure there’s a better way to hang it, but I was too excited to take some photos to think too much about it and the tape worked out just fine. The piece of the backdrop that I cut off I used for the floor to take photos of accessories or shoes.
Optional: Hangers
I decided to purchase some nice wooden hangers to hang my merchandise. It just looked SO much better than my plastic hangers could have ever looked 🙂
I used the hangers for listings in my Poshmark closet, but I also have a mannequin that I plan to use for my boutique’s website.
The hangers below were a pretty good deal at $6.99 for the top hangers and $9.99 for the pant hangers. (For the link, click images below) I casually hammered a nail in the wall to hang the hangers on – again probably a better solution for this, but it worked just fine for me.
For a grand total of $76.87 I was able to build my little photo studio and get some pretty great pictures using my iPhone.
I am very happy with how my photos turned out. I plan on buying another contrasting backdrop soon to take more pictures for my boutique’s website.
As you can see, there is a lot you can do for under $100 to take awesome photos for your boutique’s website. You can even use your new photo studio for your child’s portraits, art projects, showing off your baking skills, or so many other things!
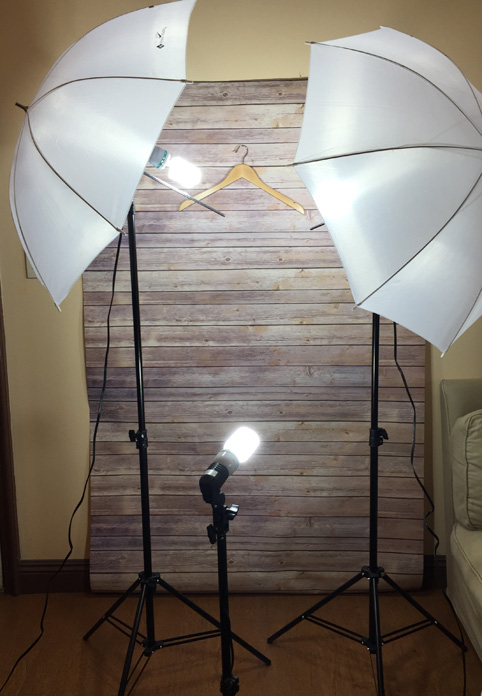




I love your website! I’ve found great tips to build my own both physical and online shop. However, I should point out that the umbrellas in the picture should face the other way around when taking photos. Otherwise, the light looks too harsh and it creates shadows around the clothes. The umbrella ins meant to diffuse the light. Hope it helps !
Hi Daniella,
Thanks so much for your comment – I think I will update my post to include that helpful information! 🙂
Your website is looking great!
-Raquel
This is awesome! I’ve been fine tuning my photography skills and plan to start using my own photographs in the boutique. Way more inviting than the stock photos that come with most merchandise. I love these suggestions. Thanks!!
Hi CeeCee,
So glad you found this post helpful! 🙂
-Raquel
Great article! Thanks for all of the info!
What was the link for the hangers? I never saw the link listed below. Thanks for the tips. They are awesome. And thanks to Daniella for letting me know how to use the umbrella lights. All new to me.
Hi Shannon,
You can just click on the photo of the hangers and it will take you directly to the ones I purchased on Amazon.
Thanks for reading!
-Raquel
Hello
Thank you for this helpful article. What hook did you use to attach to the backdrop? Did you take this off or down everytime you were finished photographing?
Thanks
Heather
Hi Heather,
I actually ended up just using a nail – it turned out to be easier than using a hook. Since I have pretty limited space in my place, I do take it down every time I’m done photographing.
-Raquel
Thank you so much for posting this. I’m not even sure if it will eventually help me personally, but I’m sharing because I know a ton of people it could.
Thanks so much Michele – I appreciate it 🙂
I can’t believe that backdrop is paper… I totally noticed the wood background and thought it was from pallets or some other cool backdrop. Had to go back and re/read it to be sure it was really just a large piece of paper. Gotta check out he paper backdrops that are available!
Thank you so much for this article! It’s funny I am one of the owners/directors of a community group (soon to be non-profit) on Facebook called Random Acts of kindness Pasco and Hernando County Florida and a soon to be second chapter in North Florida! Although I use to own a photo studio I never thought about setting up a little studio for our donated items we sell for fundraising!! I am so excited to do this now! This year we received a huge donation of new children’s clothing to use for our Christmas Fundraiser which we will be purchasing whole pallets of toys through a distributor at a great price! So now I am very excited to get our fundraiser underway (and maybe I can figure out the sales thing…lol) and make many, many children happy this Christmas! Thank you again!!
Thank you for posting this. I wanted to know if you start an online boutique would you suggest for the items I am trying to sell to be displayed on a mannequin, a real person/model, or a hanger like you have in your post? Should it be a combination of how its displayed? If using an actual person should I have the picture displayed from the neck down or a complete head to toe? Thank you so much for your time.
Amazing!! Thank you!! I just opened a boutique online and have been looking for a way to get consistent lighting in photos and this is it! Thank you!!! Amazing.
This was so great and exactly what I needed to make things look even more professional when I am working from home. Thanks for all the tips.
Thanks so much for posting links to these products! I’m a new Poshmark seller so I can use all the help I can get!
Hi Raquel, can you please share how to get the picture of the clothing with just a white background? Does photo shop need to be used or is there a different app?
Hi! Can you offer some advice about body forms or mannequins? You mentioned you were going to use one but any non-traditional ideas on where to get one? I know they can be purchased, but as someone reselling online, it seems somewhat counterproductive to spend a ton of money on a mannequin/body form, not really knowing if I’ll make that back.
Hi!
There are many affordable options for forms. I would try a hanging form like this one that’s only $6.75. It’s a good place to start if you’re not quite ready to invest in a mannequin quite yet!
-Raquel