You’ve done it! You’ve decided to start your own fashion blog!
It’s probably something you’ve been thinking about for a while now, but maybe didn’t know quite where to start.
Well, today is your day! I’m going to show you how to start your fashion blog in 3 easy steps.
Take 15 minutes right now to follow these steps and you’ll be up and running your own fashion blog before you know it!
Disclaimer: Please note that some of the links below are affiliate links and I will earn a commission if you decide to purchase through those links. I only recommend products and services that I personally use from companies that I trust.
HOW TO START A FASHION BLOG
THE THREE STEPS TO SET UP YOUR FASHION BLOG:
1) DOMAIN NAME AND HOSTING
The first thing you’ll want to do is decide what you want your domain name to be.
I suggest coming up with a list of multiple domains for your blog because it’s possible that the one you want may not be available.
So, the next thing you’ll want to do is head over to Host Gator and see if your domain is available.
Click on Domains in the upper right hand corner.

Then, type in your domain name and it will tell whether or not it is available.
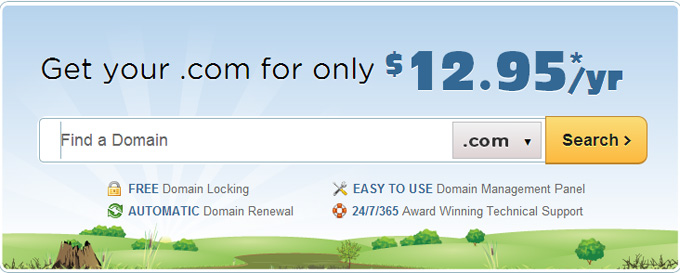
Once you have found an available domain name, you’ll also need to host your domain. A web host rents you storage space for your blog. You can use Host Gator to purchase both your domain name and for your web hosting. They have some really great packages to choose from.
Here is how to sign up for the the web hosting package I use:
Click on “View Web Hosting Plans”.

I currently have the Hatchling Plan and it’s also good to note that the longer you sign up for, the more of a discount you will receive – I originally chose a year plan.
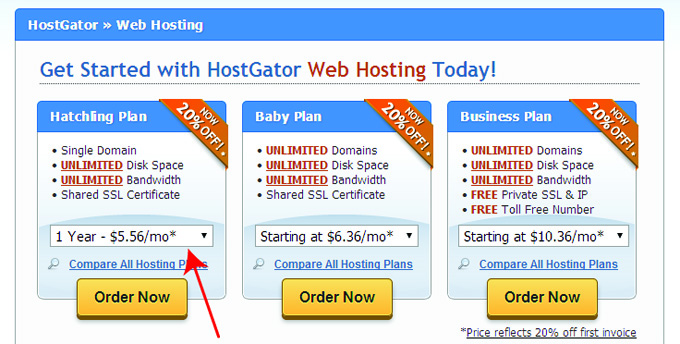
Then, fill out your information.
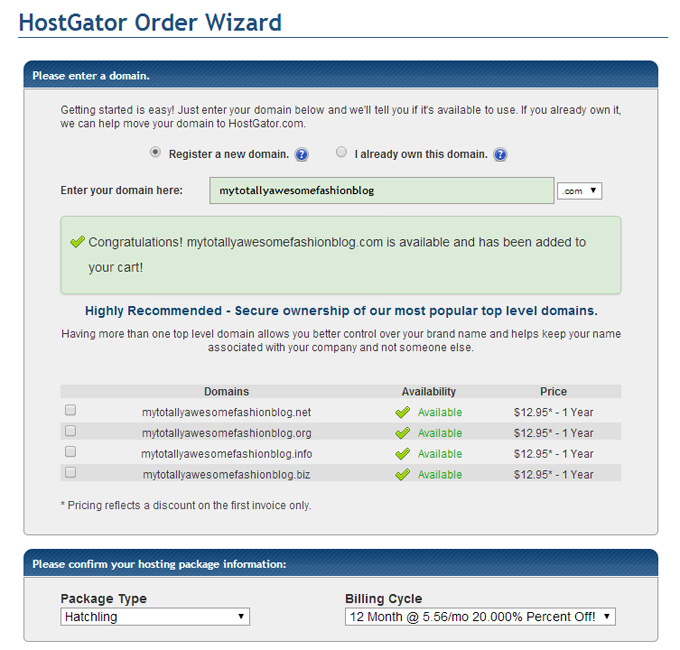
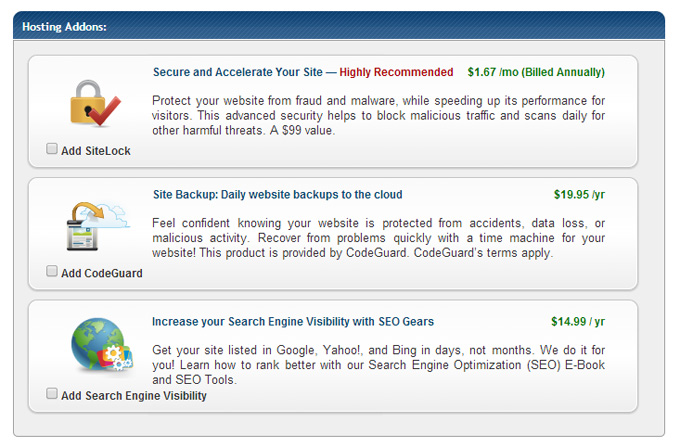
You can also choose from a few add-ons. I personally didn’t purchase any add-ons, but you can decide if you think it will be beneficial to you and your blog.
2) INSTALL WORDPRESS
Once you’ve completed registering with Host Gator, they will send you an email with your log-in information.
WordPress is my favorite blogging software and really easy to use.
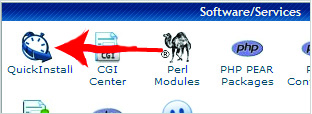
To begin installing WordPress, log in to your Host Gator Cpanel (found in your registration email) and in the Software/Services section, click QuickInstall.
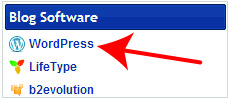
On the left, under Blog Software, click on WordPress.
Click on Continue.

Fill out the fields and options with your blog info.
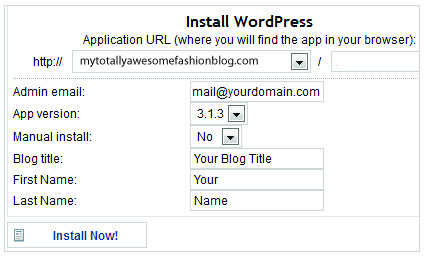
After WordPress is finished installing, you should see a “Congratulations!” message and a link that says click here. Click that link, and it will bring you to your newly installed WordPress blog! Your admin password will be emailed to you at the admin email address you provided in the above fields when you installed WordPress.
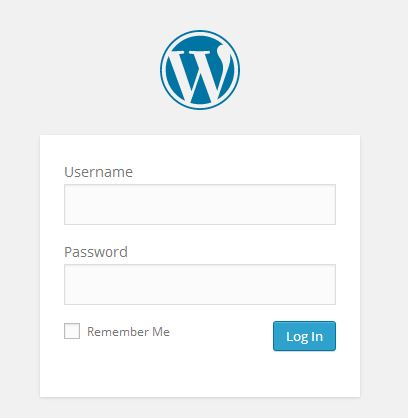
You can log into your blog at your domain address /wp-admin. For example, http://mytotallyawesomefashionblog/wp-admin would be my address.
You’ll see a login screen like the one below. Enter your Username and Password that was emailed to you.
3) CHOOSE A THEME
Now it’s time to make your blog shine with design! With WordPress, you can choose from many different free themes – which is awesome! You can check out those themes here. If you’re looking for a premium theme, check out these options:
- The Genesis Framework – This is the current framework that I am using. There are a few Fashion Blog Themes you’ll want to check out like this one. The theme you see right now on my blog is the Foodie Theme. Although the Foodie Theme is geared towards food blogs, I loved the set up of this theme and tailored it to my fashion blog.
- Elegant Themes – There are quite a few options with Elegant themes and it is easy to use and slightly cheaper than some of the other premium themes.
- Thesis Theme – This is the theme I previously used for my blog and still highly recommend it.
That’s it – you’re done! You have your own fashion blog! Now go write your first post! 😉
